
Prepare Photos for Photo to Painting: Ultimate Input Guide
Have you ever wondered why some AI-generated paintings look like museum masterpieces while others turn out blurry or distorted? The secret isn't just in the algorithm. It starts with the quality of the image you upload. If you want photo to painting results that truly impress, you need to understand how to prepare your files. This preparation ensures the best possible outcome for your digital art.
In this guide, we will explore the technical and creative steps to optimize your images. Whether you are a professional designer or a hobbyist, mastering the input process is vital. It ensures that our AI art tool can capture every detail of your vision. How can you ensure your photos are ready for a digital canvas? By following a few simple rules of composition, lighting, and editing, you can bridge the gap between a standard snapshot and a stunning work of art.
Let’s dive into the world of AI transformation. We will learn how to provide the perfect "digital DNA" for your next artistic creation.
Understanding AI Transformation Requirements
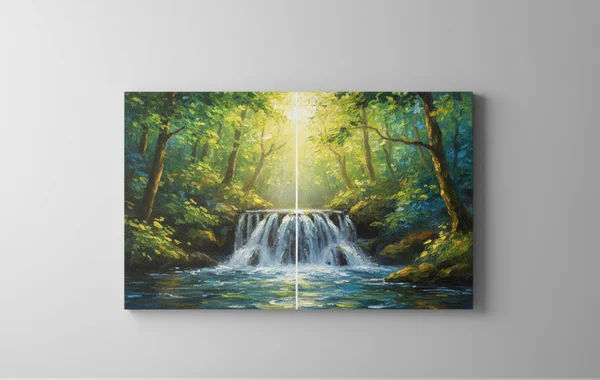
To get the most out of a photo to art converter, it helps to understand what happens behind the scenes. AI doesn't just "apply a filter." Instead, it reinterprets your image from the ground up. It identifies shapes, edges, and textures to recreate them in a completely new style.
What Happens During AI Processing
The AI used at Phototopainting.ai relies on deep learning models called neural networks. These networks have been trained on thousands of real paintings. The training data ranges from classical oil portraits to modern watercolors. When you upload a photo, the AI scans the pixels to identify key features. It looks for patterns that correspond to the artistic style you have chosen.
How Neural Networks Interpret Visual Data
When you upload a photo, the AI scans the pixels to identify key features. However, if the image is too grainy or pixelated, the AI might misinterpret shadows as physical objects. This can result in "artifacts" or strange shapes in your final painting. Providing a clear, high-resolution image allows the AI to see the boundaries between objects accurately.
Several factors dictate how well the AI performs its magic. The most critical elements are clarity, contrast, and context.
- Clarity: The AI needs to identify the subject. If a photo is out of focus, the resulting painting will likely look like a smudged mess.
- Contrast: High contrast helps the AI distinguish between the foreground and background. This is vital for styles like "Line Art" or "Sketch."
- Context: The AI works best when it understands the scene. A photo of a dog in a park is easier for the AI to process than a photo of a dog against a cluttered, messy garage wall.
When you try our tool, keep these three elements in mind. They ensure the algorithm has the best data to work with.
Optimal Composition for Photo-to-Painting Transforms
Composition is the arrangement of elements within your frame. While a painting can sometimes "fix" a bad photo, a well-composed shot always leads to better art. You want to provide a balanced image that guides the AI on where to apply detail.
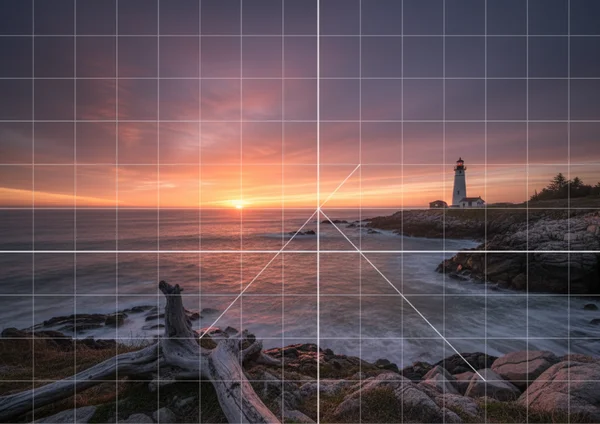
Subject Placement and Framing Best Practices
When preparing a photo to painting conversion, think like a painter. Painters rarely put their subjects exactly in the center. This is common unless they are doing a formal portrait. Use the "Rule of Thirds" to place your main subject slightly off-center. This creates a sense of movement and interest. It translates beautifully into styles like Impressionism or Watercolor.
Ensure there is enough "breathing room" around your subject. If you crop too tightly around a person's head, the AI might struggle with the edges. It needs space to generate hair or background textures effectively. A bit of space allows the AI to blend the subject into the artistic environment naturally.
Background Considerations for Different Art Styles
The background of your photo plays a huge role in the final aesthetic. Different styles require different background complexities to look their best.
- For Oil Paintings: A background with some texture creates rich, heavy brushstrokes. Look for trees, clouds, or brick walls to add depth.
- For Sketches: A simple, light-colored background is best. Cluttered backgrounds can lead to "noise" in the sketch, making it look messy.
- For Anime/Cartoon: Clean, flat colors help the AI define bold outlines. This is a key characteristic of these animated styles.
If your background is too busy, consider blurring it slightly using a photo editor before you convert your photo. This tells the AI to focus its attention on the sharpest part of the image.
Lighting and Color Preparation for Stunning Results
Lighting is crucial for both photography and AI art generation. The AI uses light and shadow to determine the 3D shape of objects in your image. For best results, pay close attention to lighting conditions before uploading your photo.
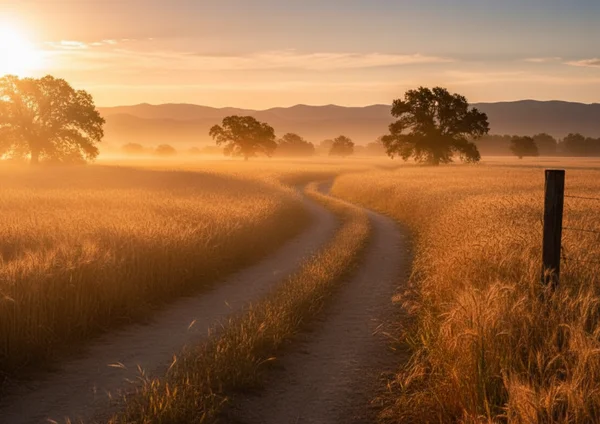
Ideal Lighting Conditions for AI Art Generation
The "Golden Hour" is perfect for AI art. This is the time just after sunrise or before sunset. The soft, directional light creates natural shadows that the AI can interpret as depth. Avoid "flat" lighting, such as photos taken under bright office fluorescent lights. Overcast days without any shadows can also make the final painting look two-dimensional.
Conversely, avoid extremely harsh shadows that hide half of a subject’s face. If the AI sees a pitch-black area, it treats it as a "void." It may fill this space with random, unwanted textures. Natural, diffused light is the gold standard for creating a realistic oil painting effect.
Enhancing Colors Before Transformation
While our AI is excellent at color grading, giving it a head start will yield better results. If your photo looks "washed out," the AI painting might also look dull. You can improve the vibrancy with a few quick edits.
- Boost Saturation: Increasing the saturation slightly can lead to more vibrant watercolors.
- Adjust White Balance: Ensure the whites are truly white. If a photo is too yellow, the AI will incorporate those tones into every brushstroke.
- Contrast is King: Increasing the contrast slightly before uploading helps the AI define the edges of objects. This is especially important for the photo to sketch feature.
Photo Editing Techniques for Better AI Inputs
You don't need to be a Photoshop expert to prepare your photos. A few 30-second adjustments on your phone can make a world of difference. These small tweaks help the AI understand exactly what you want it to highlight.
Simple Adjustments That Make a Big Difference
Before you upload to our AI painting generator, perform these quick checks:
- Crop: Remove any distracting objects at the edges of the frame. This includes things like random trash cans or a stranger's arm.
- Brightness: Ensure the subject is well-lit. If the face is too dark, use a "shadows" slider to bring out the hidden details.
- Sharpen: A slight increase in sharpness helps the AI identify textures. It makes a big difference for fur, fabric, or skin.
Avoiding Common Photo Pitfalls Before Upload
There are a few things that can confuse the AI. These often lead to poor or unpredictable results. Avoid heavy Instagram-style filters before you upload your image. The AI is designed to work with "raw" visual data. Pre-applied filters can distort colors in a way that the AI cannot easily fix.
Small, grainy images also present a challenge. Photos from old phones or low-quality social media downloads lack necessary detail. This makes it hard to create high-quality prints. Additionally, avoid "digital noise" caused by low-light settings. The AI might interpret these colored dots as part of the painting texture. By avoiding these pitfalls, you ensure that you can turn photo into art with professional clarity.
Ready to Create Your Masterpiece?
Ready to create stunning AI art? The secret lies in how you prepare your photos. With just a few simple tweaks to lighting, composition, and editing, you're giving our AI the perfect foundation. It's amazing what a little preparation can do to transform your snapshots into true masterpieces!
Whether you want a personalized gift or a unique profile picture, the quality of your input is the key. Now that you know the secrets of photo preparation, why not put them into practice? Head over to our homepage and start your transformation and test your photo today. See how your optimized photos turn into breathtaking masterpieces in just seconds!
FAQ Section
What types of photos work best for AI painting?
Photos with a clear, well-lit subject and a relatively simple background work best. Portraits, pet photos, and landscapes with distinct features produce the most consistent results. Quality inputs lead to much more realistic brushwork.
How can I fix a blurry photo before AI transformation?
While AI can enhance some details, it cannot fix a completely blurry image. You can try using a sharpening tool in a basic photo editor. However, for the best results, it is always better to start with a crisp, in-focus shot.
Should I edit my photos before uploading to Phototopainting.ai?
It is not required, but minor adjustments can significantly improve the final output. Cropping out distractions and slightly increasing contrast helps the algorithm. Our tool handles the heavy lifting, but a clean input is always a benefit.
Does the resolution of my original photo affect the quality?
Yes, absolutely. Higher resolution photos allow the AI to detect finer details. This results in sharper brushstrokes and more realistic textures. We recommend using images that are at least 1080px on the shortest side for the best clarity.
How do different lighting conditions impact AI art results?
Lighting determines how the AI perceives depth. Soft, natural light is ideal for most painting styles. Harsh lighting creates high contrast, which is great for sketches. Very low light can lead to a loss of detail and a grainy appearance.